The second week in July we are going on vacation! I am SOO excited! Now that we live in Texas we fly to most of our vacation destinations...but not this time. This time we are doing a good old fashioned road trip and I am excited...sorta! I love going on road trips with Greg...the open road, singing along to old-school DCTalk, talking, reading books, taking random photos of the side of the road. Ahh....memories! We used to make lots of trips from St. Louis to Milwaukee and Indy.
But alas, a LOT has changed since those days of care free road-tripping. We added two kids to the mix. The longest road trip we took these kids on was driving back to San Antonio from Milwakee via two days in St. Louis, but my mom was with us...and Micah was pretty little...so he slept most of the way. As I said before, things are different now. I know the kids will do great and we're going to have a great time but I'm planning a lot of things for the trip and planning on making it successful.
One thing in my plans to make the trip successful was to make little neck pillows so that if and WHEN the kids fall asleep they don't break their necks in the process. I figured, how hard can it really be to make a little curved pillow? Well, it wasn't all that hard actually. And here's my little tutorial to prove that anyone with a little basic sewing knowledge can make a neck pillow too! Because really my sewing knowledge is BASIC!
Here's the end product...but how did I get there? (Isn't he handsome?)

I started by drawing my shape on the wrong side of the fabric and pinned right sides of both fabrics together.


I then sewed around my line using the line as my guide.

Then I cut the shape out, about 1/4 inch from the sewn line. I found it MUCH easier to sew the shape and then cut it out rather than trying to sew the already cut shape. It's a good thing I have to do things twice because it gives me an opportunity to try it a different (and hopefully easier) way.

Turn the pillow right side out...I added this ribbon to Naomi's because originally I was going to use white chenile on the front but forgot so the ribbon is to differentiate between Micah's and Naomi's...plus I think it's cute!

Here are the two pillow forms waiting to be stuffed. They look the same basically but I made Naomi's a little wider at the bottom.

I stuffed the pillows pretty tight and then sewed a line near the top so that stuffing would stay tight in the bottom. I didn't fill the part between the lines too full because I didn't want it to push their heads forward.


Here are the pillows in action (she's faking it)...

(he's not).

Hope you enjoyed this little tutorial. If something isn't clear let me know and I'll try to clarify. Let me know if you make one...I'd love to see it!




 I agreed to buy a table for my local PTA's Craft Fair fundraiser. I will set up a small display for my photography and also show my felt food and take some custom orders. Hopefully it'll be a little successful!
 Fold the handles in half and sew 1/4 inch from the edge (no need to turn under since felt does not fray). Then sew 1/4 in on the other side too, so you have two seams on the handle (the second seam just makes it look better, there's no real use for it).
 Next, take the two big pieces together and sew along the two shorter sides. (Sorry that I switched colors I decided to work on Micah's bag first...hence the blue.)
  Squish the square together and sew, this will be the bottom of the bag. (Sorry for the bad photo, my nice camera is in the shop so I had to use my little digital!)
 This is what it will look like once you've sewn the bottom pieces together.
 I like to make my bags a little studier so I find the corners and sew a seam all the way up from the corners. This makes the bag more rigid. Just make sure to backstitch at all ends since little kids will be playing with this. You want to make it as sturdy as possible.
 Just another view with the outside edges stitched.
 Next, add your handles. I just picked a place where I thought they looked good and stitched them on. I used a continuous stitch and made sure to backstitch at the beginning and the end. I also added a little "X" in the middle to make it look a little better. The trick that I've found for making handles go the right way is to hold the piece that is going to be the handle flat in front of you and then just drop your hands down towards each other and you should get your handles going the right way.
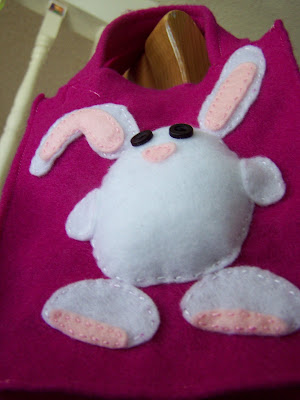
 Once the bag was finished I hand sewed on a little chick and an M on Micah's bag. I made a document with some bunnies (I'm using the white one for Naomi's bag) and a chick to copy and letters to trace for the bags. I just eyeballed the animals but cut out the letters and actually traced them onto the felt.
 Then it came time to get this on their Easter bags. First I sewed the eyes and beak onto the large yellow body, then I sewed the legs onto the bag followed by the wings and the little tuft at the top. Then I sewed the body on and before closing it all the way I added some poly-fill to make the bag pop!

 This project really didn't take me too long and it was great to work on while sitting outside watching the kids play and an easy project to do while watching TV (once the initial bag is sewn that is.) Let me know if something is not clear and I'll try to clarify. I'll post pictures later of Naomi's bag. I'm hoping to get it finished tonight!


 Posts
Posts


